Quick answer
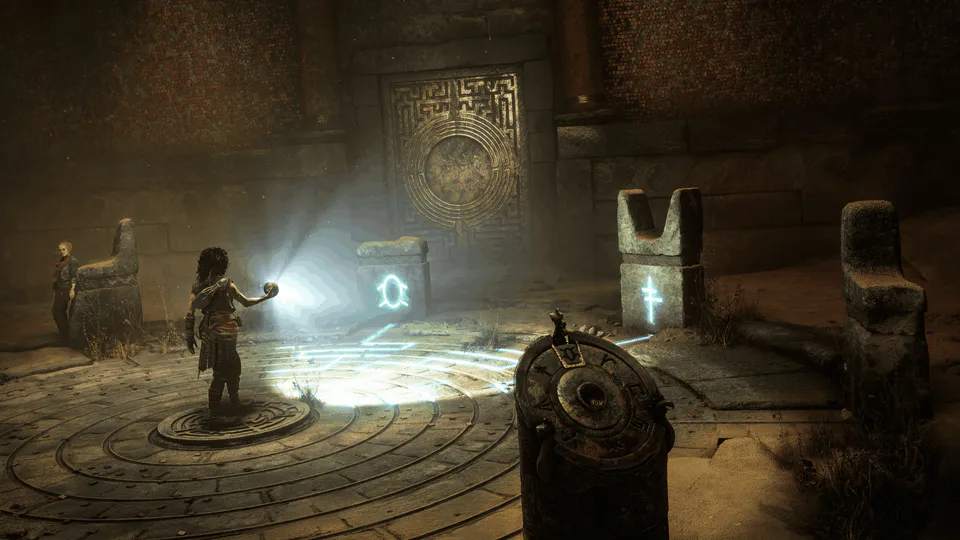
Puzzles center on Sophia's Minoan sphere: capture light, route it through mirrors and symbols, and match the pattern the room is asking for. Chapter 3 teaches mirror routing, Chapter 4 stacks the densest trials (symbols, reflectors, maze, spike traps), and later chapters add colored floors, optional tombs and multi-stage light networks. Stuck? Raise Hint Frequency in the accessibility settings.
How the Minoan sphere works
The official materials describe the sphere as a device that captures and spreads light, with a beam that changes form as upgrades are selected. It drives the island's big environmental challenges and reveals secret rooms, and the devblog notes the puzzle spaces lean on mirrors, mechanisms, environmental interaction and Leni's help to move beams where they need to go.
Three habits solve most rooms. First, find the receiver — the door, socket or pedestal that needs light — and read the symbol attached to it. Second, trace the room's engraved blue floor lines, which mark intended beam paths. Third, remember Leni: several solutions need her holding or reflecting light while Sophia completes the final leg. When a room resists, the answer is usually a mirror angle, not a missing item.
Puzzle assistance settings
The official accessibility article documents purpose-built puzzle help: a Hint Frequency setting that controls how quickly nudges arrive, a High Contrast Mode that highlights interactive objects and characters, and color settings that apply to puzzles, exploration and the sphere beam itself — useful for the color-matching rooms. Sphere controls can be set to hold or toggle.
One boundary note: the exact delay in seconds for each hint-frequency option is not published anywhere official, so this guide describes the settings functionally rather than quoting timings that no page states.
Chapter puzzle index (launch version)
The index below collects the launch version's puzzle set in chapter order, with the guide-tested key step for each. Solutions come from PowerPyx's dedicated puzzle page cross-checked against GameSpew's full walkthrough; sort by chapter to plan a cleanup trip.
Table last checked: Aug 30, 2026
| 3 | Introductory mirror rooms | Rotate mirrors to route light to door receivers; Leni holds the damaged upper mirror while Sophia finishes the reflection |
| 4 | The 3 Pedestal Symbols | Shine the sphere at the pedestals, follow the blue floor lines to the wall symbols, match pedestals left to right: Y – C – ↑ |
| 4 | Light Reflector | Stand on the upper floor plate to raise the light, then route it through the reflectors to the door symbol |
| 4 | Maze | Follow the blue lines from the pedestals; the recorded pairings are left 'O' and right 'I' |
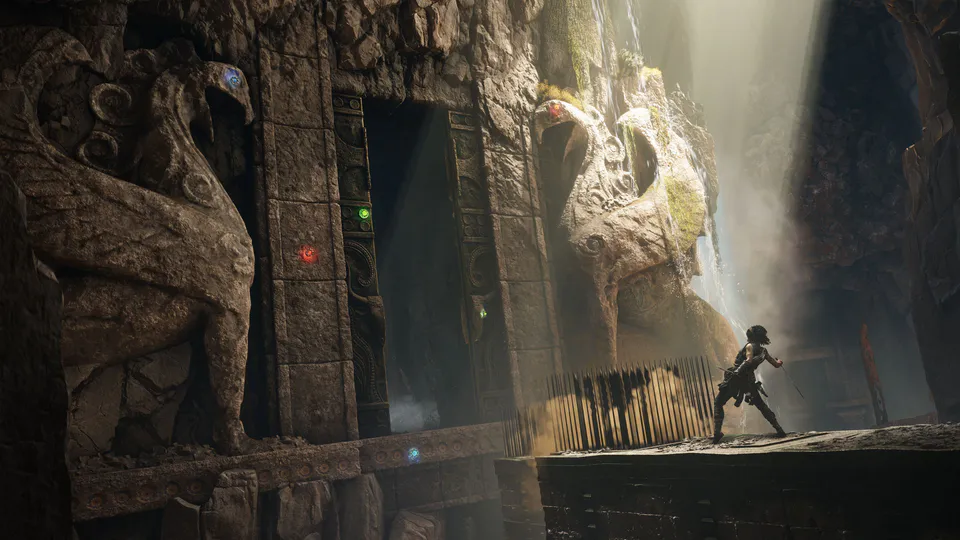
| 4 | Spike Trap | Use the wall symbols to pick safe slots — recorded routes: left–left–left, then right–middle–middle — then the safe wall slot and Leni's reflected light path |
| 4 | Bull Mirror | Match linked symbols with simultaneous mirror beams, then use the bull's hand rings to reveal two further symbols |
| 5 | Floor Symbols | Step the recorded order: Dots – Kraken – Dots – Flower – Kraken; wrong tiles kill, and a shorter route skips collectibles |
| 5 | Statue door, mirror room & three sockets | Optional set: colored statue-door match, a mirror room, and a three-socket symbol wall |
| 6 | Bull Pillar (optional) | A side tunnel holds a Bull Pillar puzzle; its chest hides the Sica blade |
| 7 | Lever, skull door & Black Temple light | Story-anchored light puzzles: lever sequencing, the skull door, and the Black Temple's beam work |
| 10 | Notebook, mirrors & round gate | Combine notebook clues, rotating mirrors and six stelae to open the three-pedestal round gate |
| 10 | Xiphos crypt (optional) | Destroy vases to reveal a hidden blue gem, then align the colored lights to open the crypt |
| 11 | Light Beam & Petrified Crank | Use concentrated light to clear growths and move shading devices; if a pushable weight is missing, restart the subchapter |
Sources: <a href='https://www.powerpyx.com/resonance-a-plague-tale-legacy-all-puzzle-solutions/' target='_blank' rel='noopener'>PowerPyx — All Puzzle Solutions</a> and <a href='https://www.gamespew.com/2026/08/resonance-a-plague-tale-legacy-walkthrough/' target='_blank' rel='noopener'>GameSpew's full walkthrough</a>. Routes are guide-tested for the launch version, not official solution lists.
Chapters 3–4: mirrors and trials
Chapter 3 is the tutorial wing: self-contained mirror rooms where rotating reflectors teach you to walk a beam from source to receiver, ending with the Leni-assisted split path. Take the lesson seriously — every later system, from wall symbols to colored lights, is that same beam-routing idea wearing new rules.
Chapter 4 is the game's trial ground, stacking five distinct puzzles in quick succession: pedestal symbols, a reflector room, a maze, spike traps and the Bull Mirror. The reliable method is to read before you touch — symbols on walls, blue lines on floors — and only then move. The spike-trap room is the one place where wrong interactions kill outright, so let the wall symbols call the plays.
Chapters 5–7: colors and tombs
Chapter 5 turns the pressure up with the floor-symbols route — one wrong tile is death — alongside optional colored statue-door, mirror-room and three-socket rooms. The floor route has two published variants: a longer path that also sweeps collectibles and a shorter safe route that skips them. Chapter 6 contributes an optional Bull Pillar tomb hiding the Sica blade in a side tunnel.
Chapter 7 shifts to story-anchored machinery: a lever sequence, the skull door and the Black Temple's light work. These rooms read as set pieces, but the underlying grammar is unchanged — identify what the mechanism wants, then feed it the beam or input it is asking for. If a room stalls, check whether Leni needs a position before assuming a symbol is broken.
Chapter 10: notebook, stelae and the round gate
Chapter 10 assembles the game's most layered sequence: notebook clues, rotating mirrors, six stelae and a three-pedestal round gate. The notebook is the piece players miss — it records the reference patterns the stelae are quizzing you on, so open it before rotating anything. The optional Xiphos crypt in this chapter hides behind vases and a colored-light alignment rather than a story gate.
Chapter 11 and late-game light traversal
Chapter 11's Light Beam and Petrified Crank puzzles close the loop, using concentrated light to clear growths and reposition shading devices. One guide-tested gotcha is worth flagging: if a pushable weight appears to be missing from its spot, the fix is restarting the subchapter — the launch version has no documented fix for the state, and a checkpoint restart resolves it.
Whether Chapters 12–13's light-traversal segments count as full puzzles is a taxonomy question guides answer differently; they use the same beam tools in a traversal frame. Functionally, expect to keep steering light until the credits.
Optional tombs and chapter select
The optional tombs in Chapters 5, 6 and 10 guard Blade rewards — the Greek Sword, the Sica and the Xiphos — and the blade-locations guide confirms none are missable: chapter select returns you to any chapter with a collection tracker active. Optional puzzles you skipped for the story can be replayed the same way, which is why a fast story run and a completion sweep can be separate passes.
Puzzle questions still open
Two details stay unresolved at launch and are tracked below. Neither blocks progress; both would make the guide more precise once documented.
Frequently asked questions
How do the puzzles in Resonance: A Plague Tale Legacy work?
Nearly every puzzle runs through Sophia's Minoan sphere, a tool that captures and spreads light. You position mirrors, follow engraved floor lines and match wall symbols to route beams to receivers; upgrades change the beam's form and reveal secret rooms. Story puzzles gate progression, while optional tombs hide weapon rewards.
Is there a hint system if I'm stuck?
Yes. The official accessibility options include a Hint Frequency setting, High Contrast Mode that highlights interactive objects, color settings applied to puzzles and the sphere beam, and hold/toggle options for sphere controls. The exact delay per hint frequency has not been published.
Can I miss puzzles or their rewards?
Optional tombs in Chapters 5, 6 and 10 hide Blade rewards, and the blade-locations guide confirms none of the eight base-game Blades are missable — chapter select lets you return after the story, with a tracker. There is no confirmed global 'solved puzzles' checklist in the menus.
Do puzzles have only one solution?
The routes below are guide-tested solutions, not official claims of uniqueness. Reviews note that environmental clues usually point toward a clear answer, but this guide does not assert that every puzzle has exactly one valid route.
Resonance Wiki is an independent, fan-made guide. It is not affiliated with or endorsed by Focus Entertainment or Asobo Studio. Puzzle routes reflect the launch version as checked on August 29–30, 2026.